How to Make Easy Borders in Fire Alpaca
Hello! It's Kittyremii. If you need help to easily align your fame with a template for a collab, you're in the right place! If you have any questions, leave a comment and I will get back to you. These steps are for if you are using a laptop, but if you don't draw on a laptop it is also possible to use in Google Slides. Here is a video link explaining how to do this alternate method. And if you dont have Google Slides, this website is also an option.
Step One: Make Sure you Have a Working Drawing Program
Download a drawing program that has layers, the ability to re-size images, and the option to change the transparency of an image. Any drawing program with these features will work, but if you don't have one slash don't know how to do these things in your drawing program, I recommend Paint Dot Net or Fire Alpaca.
How To Download (not required if you have a drawing program the meets the requirements above)
Simply click on the download button that corresponds with the computer you're using and follow instructions (both programs are free).
Paint Dot Net
Fire Alpaca
Pros and Cons of Both Drawing Programs
These pros and cons wont effect your ability to use them for collabs.
| Fire Alpaca | Paint Dot Net | |
|---|---|---|
| Pros: | - Overall amazing drawing program, lots of tools - Good for digital art - Has pressure sensitivity (when using a drawing tablet) - Free | - Simple to understand and use - Good for collab alignment if you're not going to use it for much else - Lighter download then Fire Alpaca -Free |
| Cons: | - Ads (but luckily only one add per time you open it) - Harder learning curve to use than Paint Dot Net | - No Pressure sensitivity (when using a drawing tablet) - Less tools and overall not as good of a drawing program as Fire Alpaca |
Step 2: Download the Collab Template
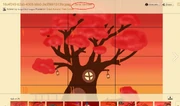
Download the collab template you're doing. Screenshots are worse and sometimes too small to see what you're doing. Although if you cant download the image, screenshots do the trick. To download the image, click on it and then click "see full size image"
 |
|---|
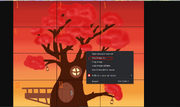
Next right click the image and click "save image as"
 |
|---|
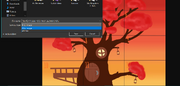
Save image as a png or jpeg file. To do this click the drop down menu and look for either of these options. If neither of those apear, a screenshot will work. Save it on your desktop or in a place where you can find it later.
 |
|---|
Step 3:Open the Template in your Drawing Program of Choice
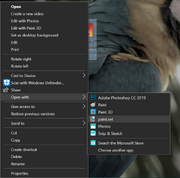
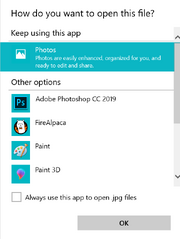
Right click the downloaded template and hover over "open with" and then click your drawing program.
 |
|---|
If your drawing program does not apear, select the "Choose another app" button. Scroll down until you find it. If you still can't find your drawing program, leave a comment and I will help you.
 |
|---|
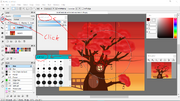
Step 4: Aligning your Frame
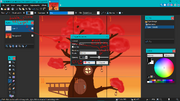
Finally we get to make sure that your frame is aligned. First add a layer above the template
| Fire Alpaca | Paint Dot Net |
|---|---|
 |  |
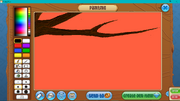
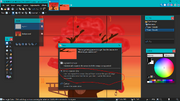
Make the second layer's opacity (transparency) about half (you can adjust this later if you want to make is easier to align your frame)
| Fire Alpaca | Paint Dot Net |
|---|---|
 |  |
Take a screenshot of your frame (do this before you add any detail, it makes it easier to make changes later if nessisary) and save it to your desktop, or somewhere you can find it later.
 |
|---|
Open the saved screenshot into your drawing program (the same drawing program you still have open from before). To do this, follow the same steps you completed to open the template into your drawing program.
Next, the steps will varry depending on the drawing program you're using. Basically, you're going to want to copy the screenshot onto layer 2 (the second layer above the template, it dosent matter what it's named) and then re-size it until it fits your frame on the template. from there you can see any mistakes you make with your alignment, and fix them. From there it's just trial and error to get your alignment correct.
First I'll show you how to do this in Paint Dot Net, then in Fire Alpaca. Scroll past the paint dot net tutorial if you're using Fire Alpaca.
Paint Dot Net
The image will be opened in a new tab. Select the image with the select tool. Select the entire image by starting the rectangle selection a little outside the image. Then hit Ctrl + C on your keyboard to copy it.
 |
|---|
Next, flip over to the other tab with the template.
 |
|---|
Now press Ctrl + V on your keyboard to paste your frame in. If a window pops up asking to "keep canvas size?" click "keep canvas size".
 |
|---|
Next, your frame should look transparent over the template.
 |
|---|
Adjust the size of your frame by clicking and draging the little circles in the corners of your image.
 |
|---|
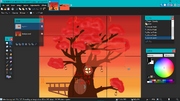
Keep adjusting and move your image untill it fits perfectly where your frame should be.
 |
|---|
From here, go back in Animal Jam and change anything that dosen't fit. Then take a new screen shot of your changes and complete these steps again until your frame aligns perfectly with the template. Don't forget to delete the transparent image between steps. To do this, select the image on layer 2 and hit the delete key on your keyboard. Then hit enter on your keyboard to deselect.
Fire Alpaca
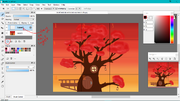
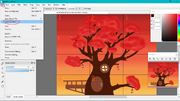
In Fire Alpaca, things are slightly more complicated. Click the file button on the top left, and it will show a drop down menu. From there, click "open file as layer". Select the screenshot of your frame for the collab.
 |
|---|
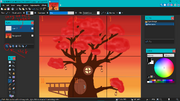
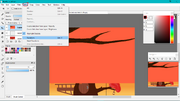
Click the "Select" drop down menu
 |
|---|
Click the "Transform" button
 |
|---|
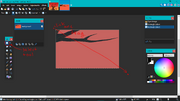
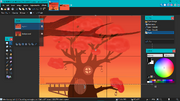
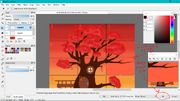
Make the image fit inside the border of where your frame is suposed to go in the template. To re-size the image click and drag the little squares around the image. Then click ok.
 |
|---|
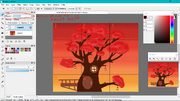
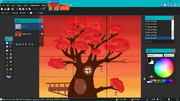
Next click the button circled in the screenshot below. Make sure you have the third layer selected. This will combind layers two and three, making your frame transparent.
 |
|---|
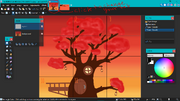
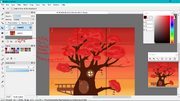
From here, go back in Animal Jam and change anything that dosen't fit. Then take a new screen shot of your changes and complete these steps again until your frame aligns perfectly with the template. Don't forget to erase the transparent image in between steps.
 |
|---|
I really hoped this helps! I've always wanted someone to make a tutorial of how to do this to help people who are new to collabs, so I made one myself. Have fun drawing your collabs!
Source: https://animaljamart.fandom.com/wiki/User_blog:MrowKat/How_to_Easily_Make_Sure_your_Frame_is_Aligned_for_a_Collab
0 Response to "How to Make Easy Borders in Fire Alpaca"
Post a Comment